Changing your domain’s DNS settings
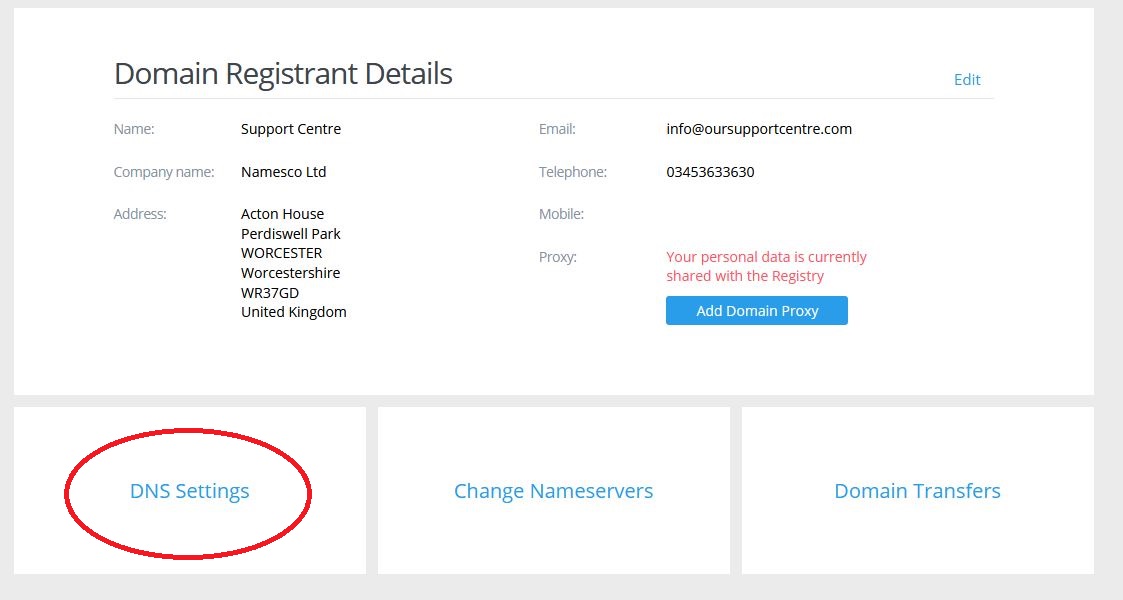
Once logged into your Control Panel, click on your domain (if you have more than one), scroll to the bottom of the page and select DNS Settings.

If this is the first time you have ever been to this page, you may see a box appear entitled Activate Advanced DNS, which will require you to tick the confirmation tickbox and click Activate.
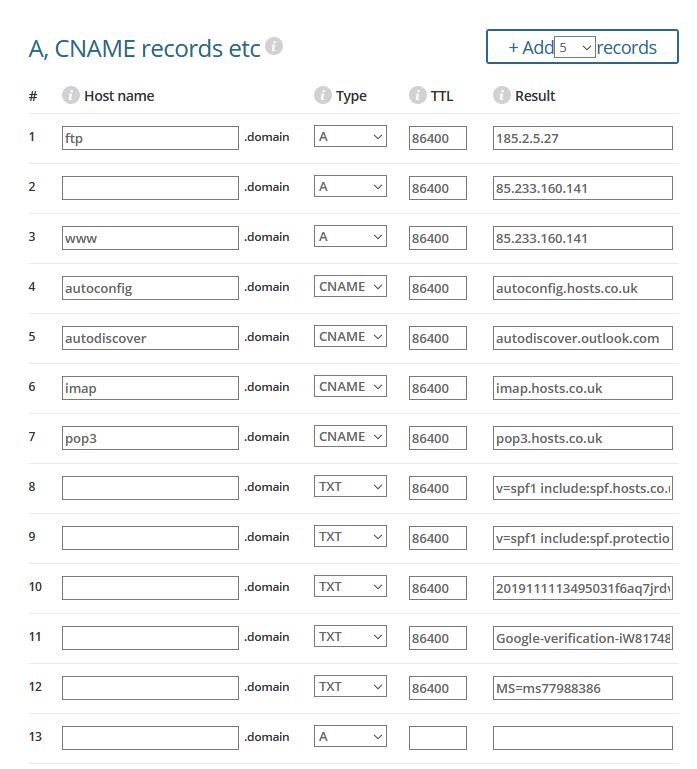
Once you have done that once, clicking on DNS Settings will then always take you to the screen shown below.

It is expected that if you are entering in DNS records then you have a degree of familiarity with DNS. If you are at all uncertain about anything then we recommend contacting us for assistance.
The first section is called “A, CNAME records etc”, and is mainly used for creating or modifying A, CNAME or TXT records.
As an example, if you wanted to create an A record called test.mydomain.com and point it to IP Address 123.123.123.123 then on the first empty row you would enter test into the Hostname box, choose A as the Type, and enter 123.123.123.123 as the Result.
This is shown below.

If you have used up all available rows there is an Add Records button in the top right which will allow you to create a new empty row.
With regards to CNAME records, if you wanted to create a record called new.mydomain.com and alias it to www.mynewdomain.com then that would look like the following.

You may want to create a TXT record, for SPF or domain validation purposes. This is done by leaving the Hostname field empty, and entering the required TXT string into the Result box. There are some examples of common TXT records on the earlier screenshot.
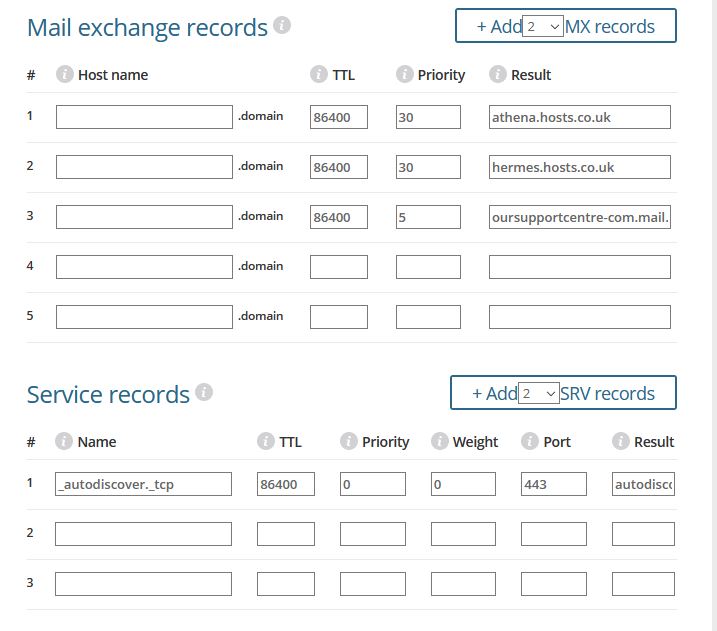
The second half of the page looks as follows.

These two sections allow you to create and modify MX and SRV records, and there are some common examples of these records displayed in the screenshot. The Hostname is usually left blank for MX records, unless you are setting up email services for a subdomain rather than the actual domain itself.
If you wish to delete a record simply remove the contents of the Hostname and Result fields, so that the row that contained that record is now empty.
Once you have entered or modified the required records click Save in the bottom right corner.
Note: Any DNS changes may take up to 48 hours to fully propagate, and become live.


